

Beekeeping is a rewarding venture. It lets you connect with nature in a unique way. The feeling of harvesting your first jar of honey is hard to match. It’s more than just a hobby. Beekeepers help the environment by pollinating nearby flowers and food crops. Without pollinators, many of the foods we eat would struggle to grow. So when you become a beekeeper, you’re not just helping yourself you’re helping your community.
Answer the Big Question: Is Beekeeping Right for You?
Before you start, it’s a good idea to ask yourself a few questions. Do you have a small space where you can safely keep a beehive? Are you comfortable around insects that can sting when they feel threatened? Some people find it calming to work with their hives, while others find it challenging. The key is patience and curiosity. If you’re ready to learn and appreciate the role these tiny creatures play in nature, beekeeping might be a perfect match.
Choose Your Beekeeping Location
Your hive’s location is a big decision. It’s not something you should rush. Ideally, you want a spot that gets plenty of sunlight in the morning and some shade in the afternoon. That way your colony stays warm but not overly stressed by the heat. Make sure it’s sheltered from strong winds and heavy rain. Your bees need a nearby water source, whether it’s a small pond, a stream, or a shallow bowl filled with pebbles. The pebbles allow the insects to safely land and drink without drowning. Also, consider your neighbors. Be respectful of their space and preferences. A fence or a row of shrubs can help direct the flight path of your colony upward and away from nearby properties.
Gather Your Beekeeping Supplies
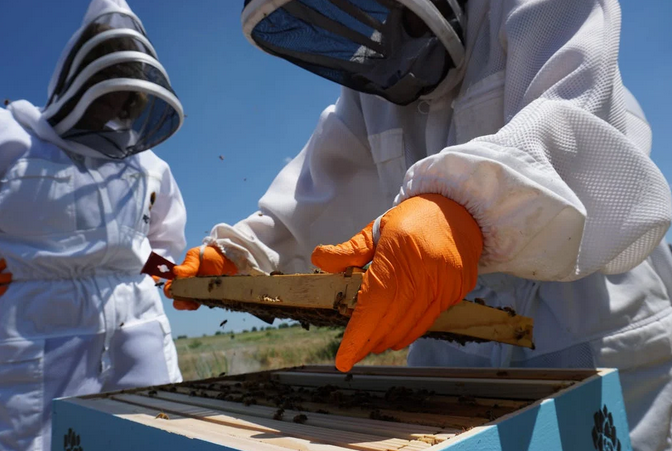
Getting started means having the right tools from day one. The first piece of equipment you need is a hive typically a Langstroth or Top Bar where your colony will live. Inside the hive are frames filled with wax foundations. Your workers will use these to raise their young and store honey. You’ll also need protective gear. A bee suit, gloves, and a hat with a mesh veil will help keep you comfortable and reduce the chance of stings. Smokers, hive tools, and bee brushes are useful, too. The smoke calms the colony, making it easier for you to perform maintenance and check their progress.
Install Your Colony
Once you have your equipment, it’s time to populate your hive with a colony of honeybees. The most popular way to start is by purchasing a package of workers and a queen from a reputable supplier. The queen comes in a small cage to keep her separate and unharmed during transport. Installing your colony is a delicate process. First, you hang the queen’s cage in the center of your hive. Next, you gently shake the workers from their boxes. The colony will release the queen from her cage in a few days and start building comb and collecting nectar immediately.
Care for Your Bees
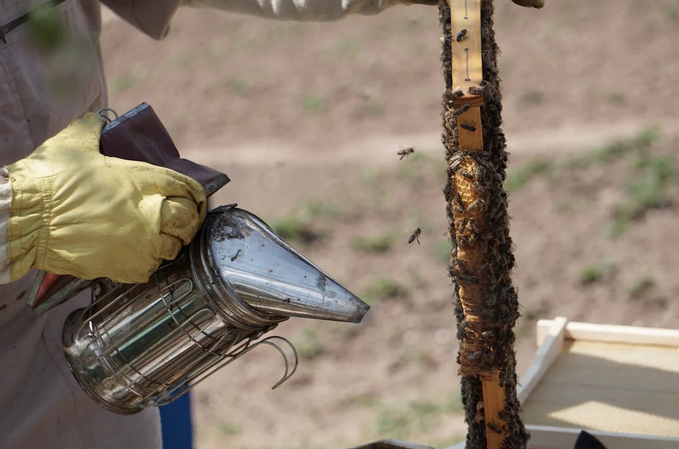
Your job as a beekeeper is to care for your colony and help it stay healthy. That means opening the hive regularly roughly once a week during the busy season to check for disease, pests, and proper food stores. Watch for signs of trouble. Varroa mites, for example, can harm your colony if not treated promptly. Small hive beetles, wax moths, and viruses can all affect bee health. Staying vigilant and addressing issues quickly will help you avoid bigger problems later. Also, make sure your colony has enough food, especially in late summer and early fall. If the nectar flow drops, you may need to provide a sugar syrup supplement to keep them strong through the season.
Your first harvest is a moment to celebrate. Ideally, you should wait until your colony has filled and capped at least a few frames of honey. Capped honey means the water content is low enough to safely store it for a long time. Using a bee brush or blower, you can clear the comb of workers and bring it back to extract. Some beekeepers use a small centrifuge called a honey extractor to spin the honey from the combs. Once extracted, it’s a simple matter of straining it to remove wax and debris and then bottling it in jars.